How to install LandingRabbit for Claude Code (CLI)
You can now create and edit landing pages, blog posts, and help docs directly from Claude Code.
This help doc walks you through the installation steps and shows you how to use LandingRabbit inside Claude.
Install the LandingRabbit plugin
You can find the installation instructions on our GitHub page.
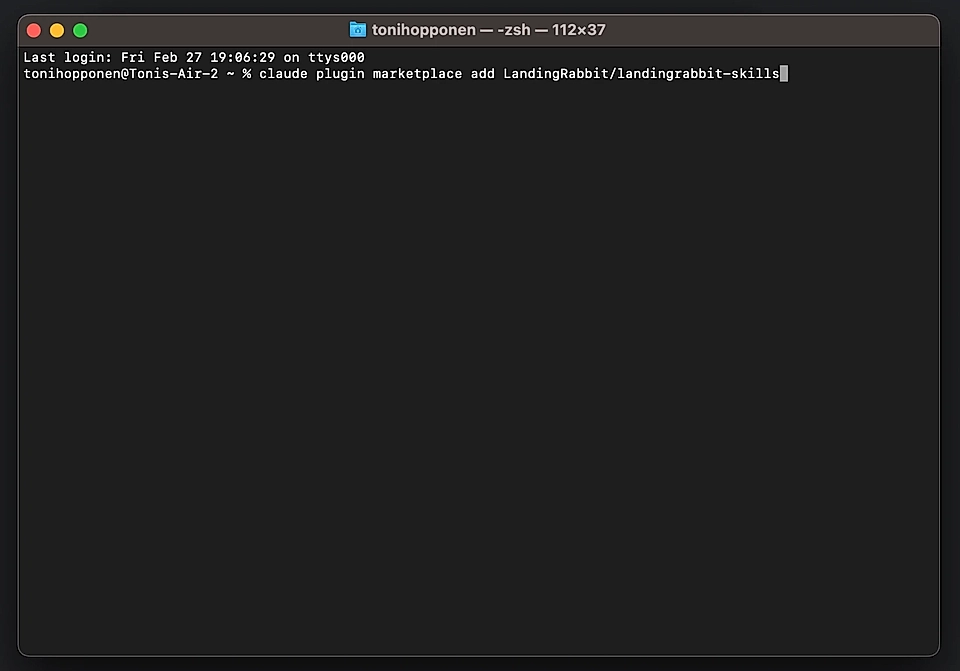
Start by running the following command in your terminal:
claude plugin marketplace add LandingRabbit/landingrabbit-skills
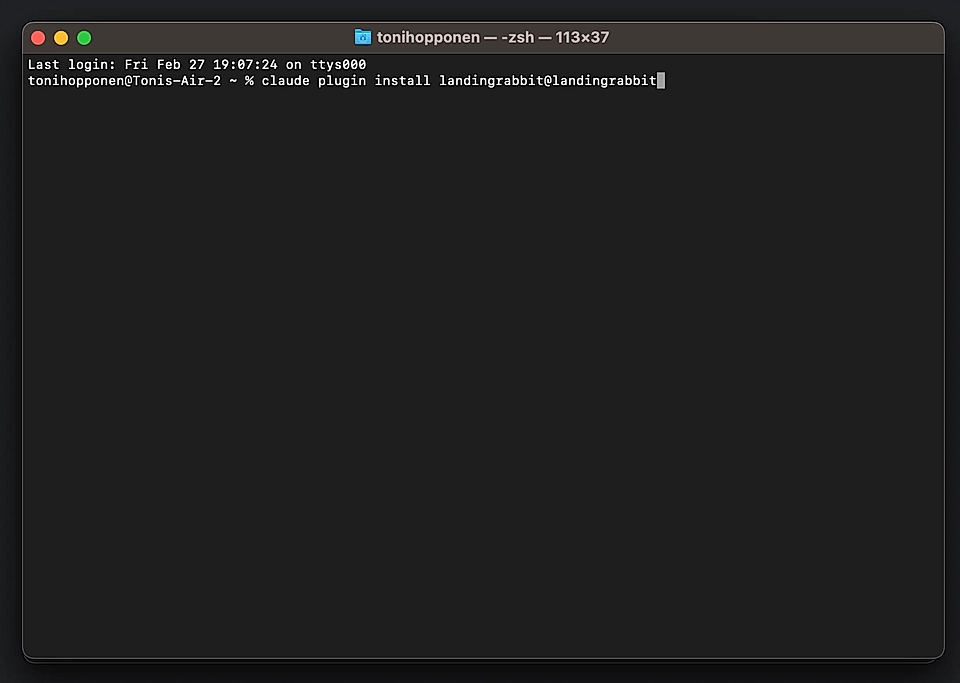
Next, install the Claude plugin:
claude plugin install landingrabbit@landingrabbit
After installation, you'll need to restart Claude in your CLI. If you're using terminal, close and reopen it.
Connect the MCP server
When you open Claude after restart, type:
/landingrabbit
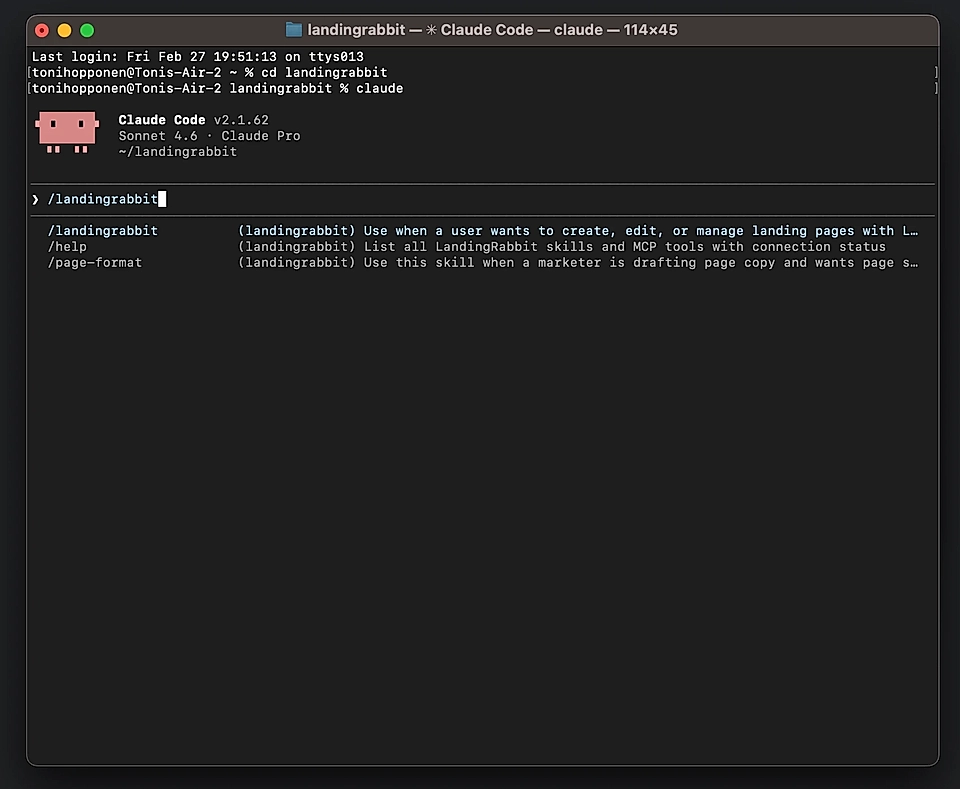
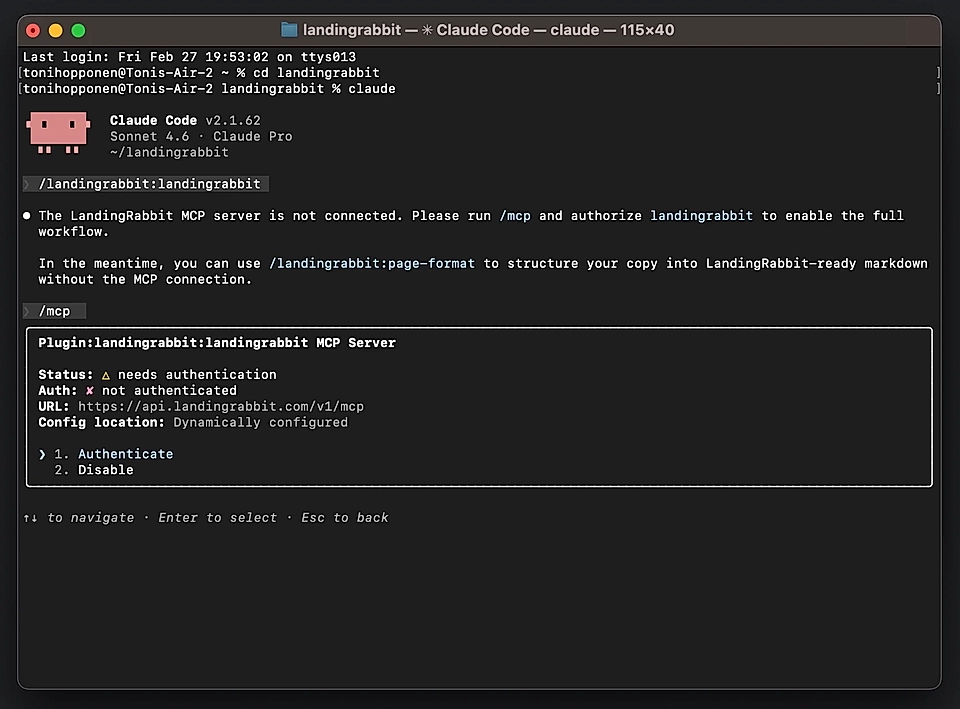
Claude will tell you the MCP hasn't been connected yet.
To connect it, type:
/mcp
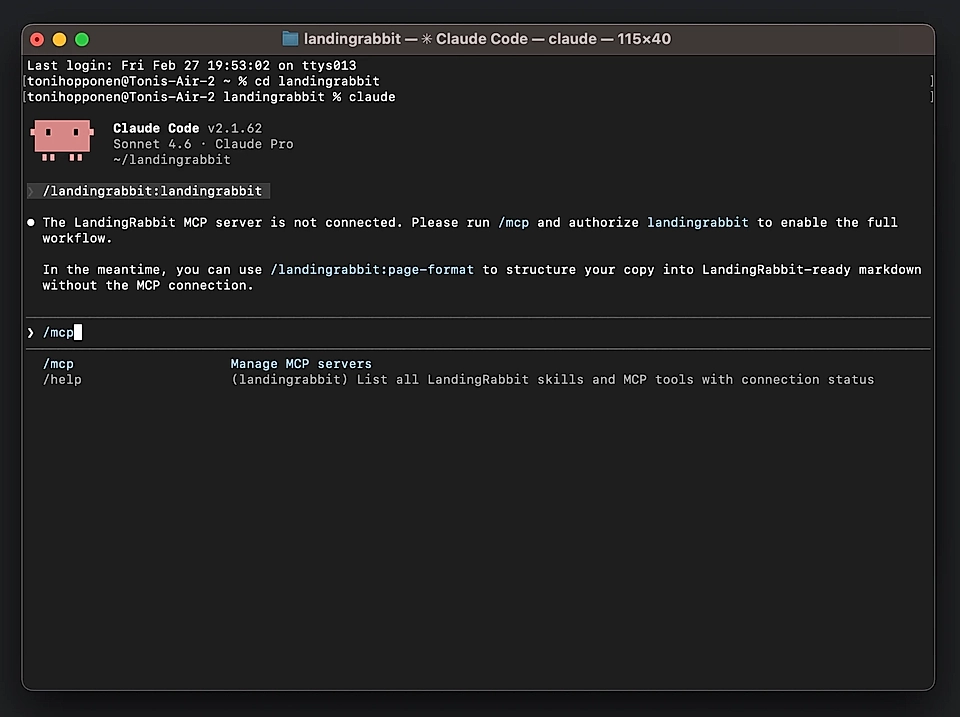
Find the LandingRabbit plugin from the list. It will say 'needs authentication.'
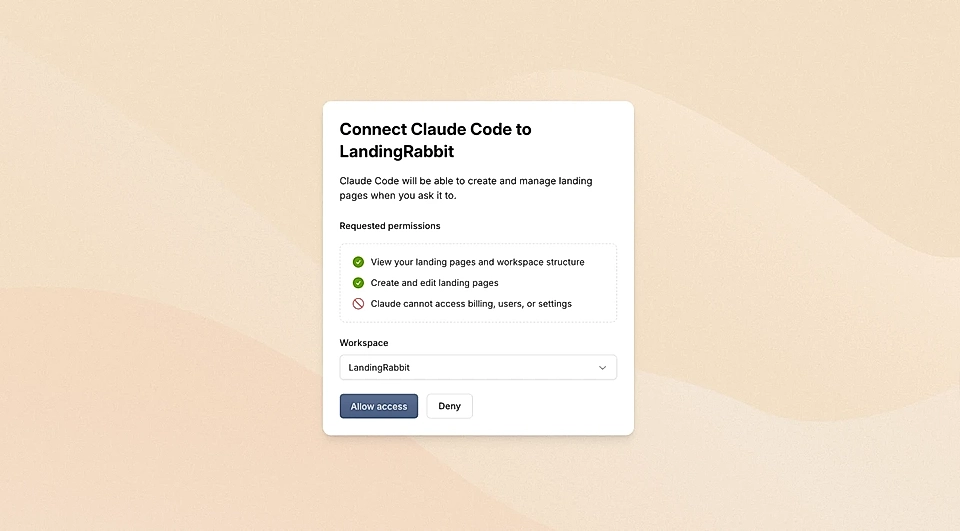
After choosing to authentic, a popup window opens up. Connect your workspace with Claude Code.
Available tools in LandingRabbit for Claude Code
After authentication, you can see all available tools by typing: /landingrabbit:help
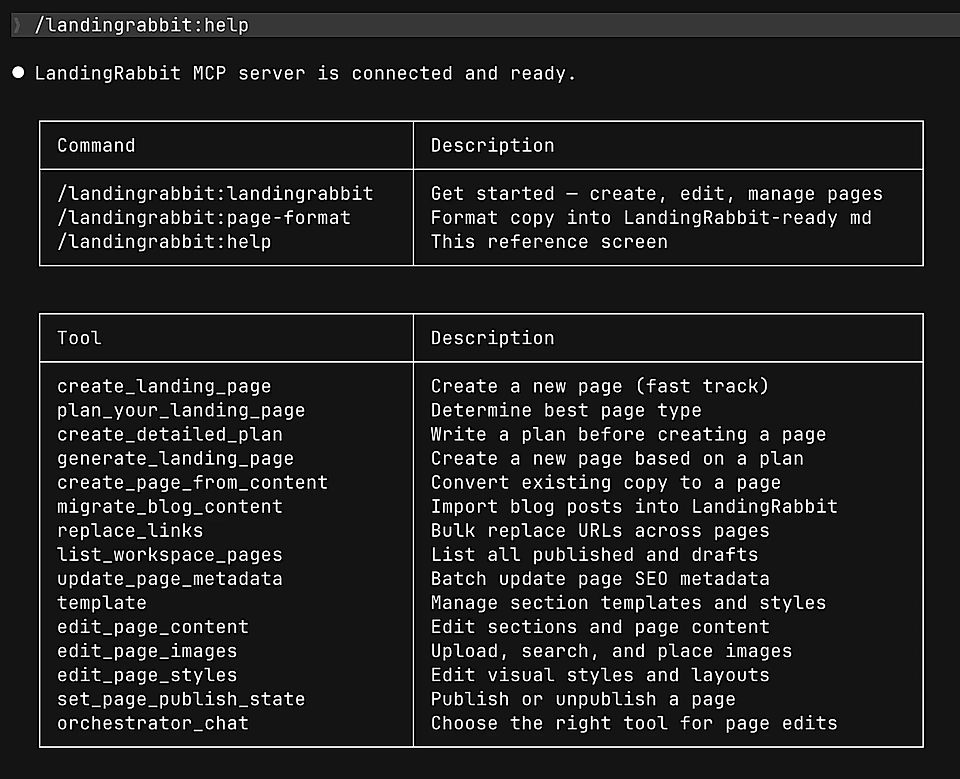
LandingRabbit for Claude currently includes tools for:
Creating new pages (landing pages, blog posts, help docs, etc.)
Planning pages
Creating pages from content you already have (e.g., Word doc)
Editing page content
Uploading and editing page images
Editing page styles and templates
Editing page meta title and description
Publishing and unpublishing pages
Listing all drafts and published pages
Migrating blog posts from other websites
Bulk replacing links (e.g., changing marketing URLs)
Create your first page
After successful installation, just type a page topic, title, or idea you'd like to create.
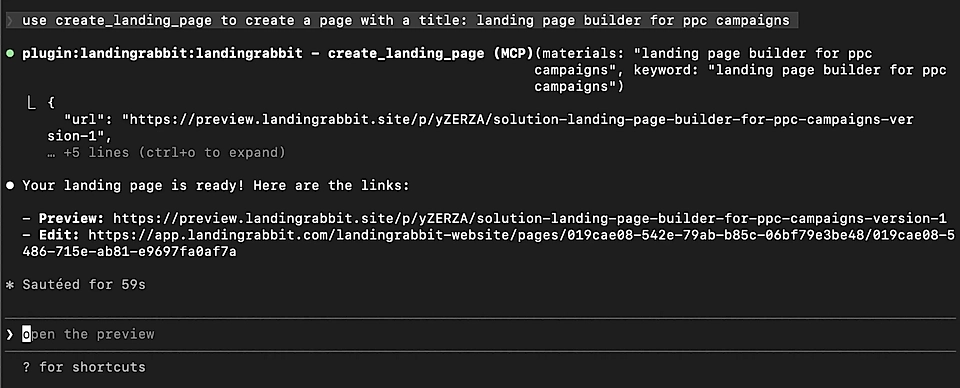
Claude will return a ready page for you.
You can then edit it, adjust styles, and publish when ready. Via LandingRabbit's page editor or asking changes via terminal. Your choice!