How to edit the Steps section look and feel
Steps section is one of the most versatile sections in LandingRabbit.
You can use it to show customer problems, how your product works step by step, onboarding instructions, benefits, and much more.
Here's how to customize it.
Change image position and fit
Start by opening the layout options.
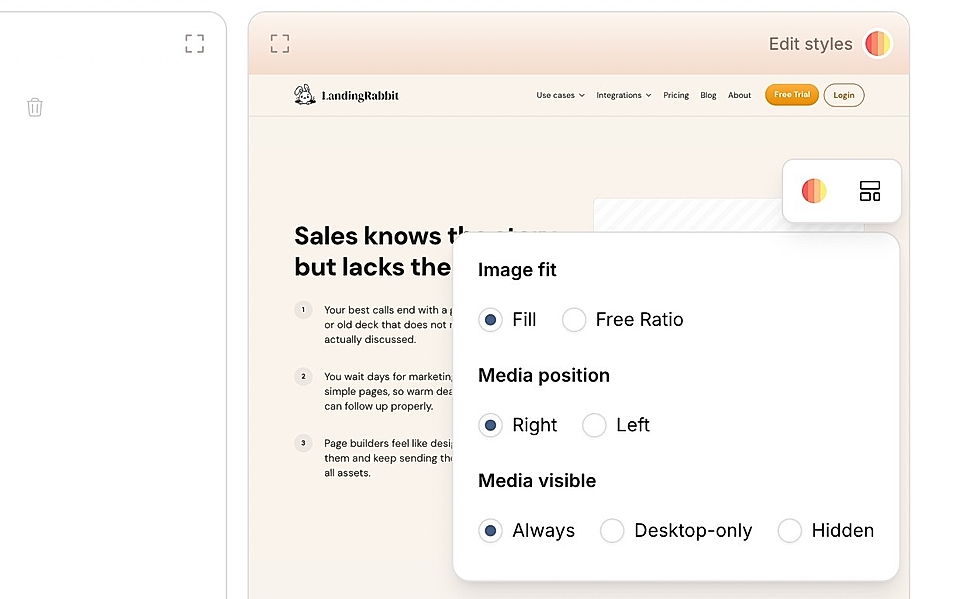
Choose whether the image or video should:
Fill: the media fills the available space based on text length
Free ratio: you control how much space the media takes
You can also:
Switch media to the left or right
Hide media completely, moving text content to the middle
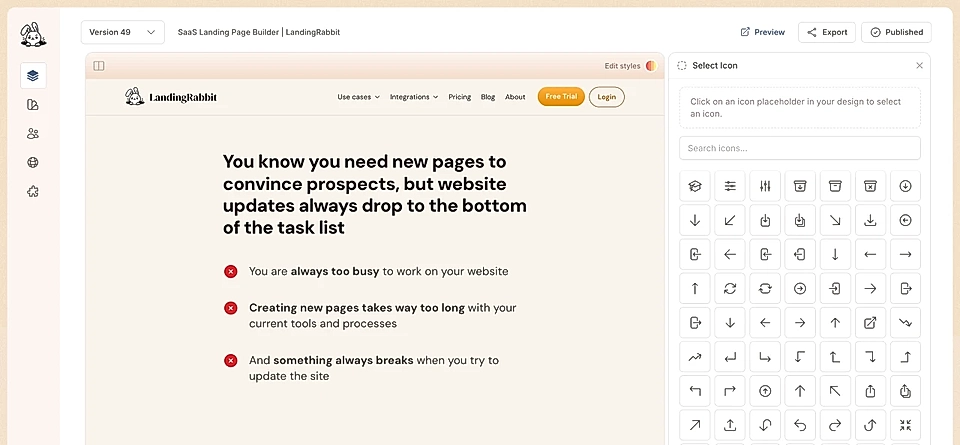
Choose your step icons
In the text editor, you'll find a dropdown for step icons.
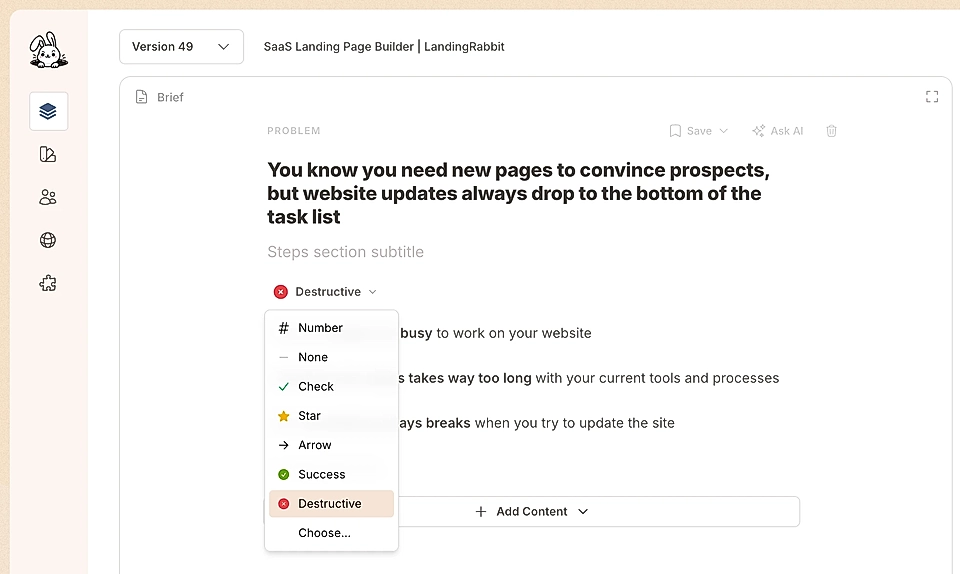
Options include:
Numbers (1, 2, 3, etc.)
Check marks
Star
Arrow
Success
Destructive
No icons (text only)
In addition, you can click 'Choose' and find the right one from more than 6000+ icons.
Add and organize content
Click 'Add content' to add more elements.
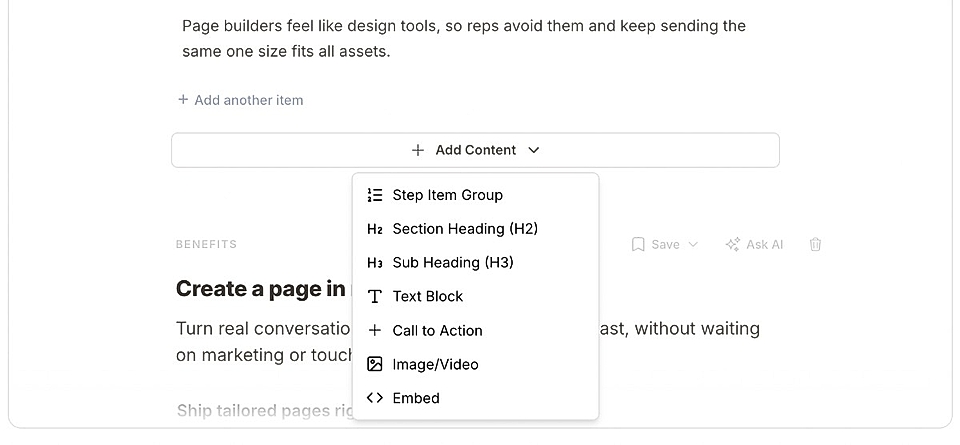
You can include multiple steps item groups. For example, show the downsides of alternatives first with destructive icon, then use success icons to show how it works with your service.
You can add:
Steps item group
Section heading (H2)
Subheading (H3)
Text block
Call to action
Image or video
Embed
Adjust styles with AI
Click the 'Edit styles' icon in the preview.

You can ask LandingRabbit to make changes in natural language:
Widen the section (e.g., "make this section 1200 pixels wide")
Give more space to media and less to text
Increase the horizontal gap between media and text
Change text sizes and font type
Change every text item width separately
Update colors
Just describe what you want, and LandingRabbit will apply the changes.